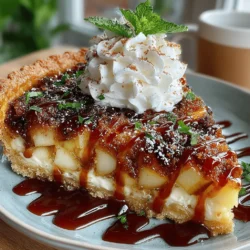
Maple-Kissed Apple Cinnamon Tart: A Deliciously Sweet Fall Dessert
As the leaves begin to change and the air turns crisp, the allure of seasonal desserts becomes irresistible. Autumn is a time for gathering, sharing, and celebrating, and what better way to embrace the season than with a homemade dessert that encapsulates the essence of fall? The Maple-Kissed Apple Cinnamon Tart is a delightful creation that combines the sweet, buttery goodness of maple syrup with the warm, comforting flavors of cinnamon and fresh apples. This tart is not just a treat for the taste buds; it evokes the cozy atmosphere of a fall evening spent with loved ones, making it a perfect centerpiece for your seasonal gatherings.
One of the standout features of this recipe is its simplicity. With a few quality ingredients and straightforward techniques, bakers of all skill levels can create a stunning dessert that looks as good as it tastes. Whether you are a seasoned pastry chef or a novice in the kitchen, the Maple-Kissed Apple Cinnamon Tart offers an approachable and elegant way to showcase your baking skills while delighting your family and friends with a deliciously sweet offering.
Understanding the Ingredients
To create the perfect Maple-Kissed Apple Cinnamon Tart, it’s essential to understand the role of each ingredient in this harmonious blend of flavors. The primary star of the tart is, of course, the apples. Selecting the right type of apple is crucial for achieving the desired tartness and texture. Granny Smith apples are often recommended for this recipe due to their perfect balance of tart and sweet. Their firm texture holds up well during baking, ensuring that each bite offers a satisfying crunch without becoming mushy.
In addition to the apples, spices play an integral role in enhancing the overall flavor profile of the tart. Cinnamon is a classic spice that brings warmth and depth, while a hint of nutmeg adds a subtle complexity that elevates the dish. Together, these spices create a comforting aroma that fills the kitchen as the tart bakes, inviting everyone to gather around in anticipation.
Another key component of this recipe is the tart crust. The crust serves as the foundation for the entire dessert, and achieving a flaky, tender texture is vital. Made from simple ingredients such as all-purpose flour, butter, sugar, and a pinch of salt, the crust should be light and crisp to complement the sweet apple filling. The use of chilled butter is essential in creating that sought-after flakiness, as it helps create steam during baking, resulting in a beautifully layered texture.
Crafting the Perfect Tart Crust
Creating the perfect tart crust may seem daunting, but with the right approach, it can be an enjoyable and rewarding process. Begin by gathering your ingredients: all-purpose flour, cold unsalted butter, granulated sugar, and a pinch of salt. It’s important to work with chilled butter straight from the refrigerator to achieve a flaky texture. The cold fat will create pockets of steam as it bakes, allowing the crust to rise beautifully.
Start by measuring out the flour and salt into a mixing bowl. Next, cut the cold butter into small cubes, adding it to the flour mixture. Using a pastry cutter or your fingertips, gently blend the butter into the flour until the mixture resembles coarse crumbs. Be careful not to overwork the dough; the goal is to keep small pieces of butter intact to ensure a flaky crust.
Once the butter is incorporated, add the granulated sugar and mix briefly. Gradually add ice-cold water, one tablespoon at a time, mixing until the dough begins to come together. The key here is to use just enough water to bind the dough without making it sticky. Once combined, turn the dough out onto a lightly floured surface and gently knead it a couple of times to bring it together into a cohesive ball.
After forming the dough, flatten it into a disk, wrap it in plastic wrap, and place it in the refrigerator to chill for at least 30 minutes. Chilling the dough is a crucial step that allows the gluten to relax, resulting in a tender tart crust. It also keeps the butter cold, preventing it from melting before baking, which is essential for achieving that flaky texture.
Once the dough has chilled, it’s time to roll it out. Lightly flour your work surface and a rolling pin to prevent sticking. Gently roll the dough into a circle, aiming for about 1/8 inch thickness. Carefully transfer the rolled dough to a tart pan, pressing it into the corners and trimming any excess that hangs over the edges. Prick the bottom of the crust with a fork to prevent it from puffing up during baking.
Now that your tart crust is ready, it’s time to prepare the flavorful apple filling that will take this dessert to the next level.
Creating the Flavorful Apple Filling
When it comes to the apple filling, selecting the right apples is key to achieving a perfect balance of flavors. As previously mentioned, Granny Smith apples are an excellent choice due to their tartness, but you can also consider mixing in a few sweeter varieties, such as Honeycrisp or Fuji, to add depth to the filling. These apples will provide a lovely contrast to the tartness of the Granny Smith, resulting in a more complex flavor profile.
To prepare the apples, start by peeling and coring them. Slice the apples into even wedges to ensure they cook uniformly. In a large mixing bowl, combine the sliced apples with granulated sugar, cinnamon, nutmeg, and a splash of fresh lemon juice. The sugar will help to draw out the natural juices of the apples, while the spices will infuse them with warmth and flavor. Toss the ingredients together gently until the apples are evenly coated, allowing the mixture to sit for a few minutes to enhance the flavors.
Once your apples are prepared, they are ready to be added to the tart crust, creating a beautiful, layered effect that is as pleasing to the eye as it is to the palate. The combination of sweet maple syrup and aromatic spices will transform these simple ingredients into a stunning dessert that embodies the spirit of fall.
Stay tuned for the next part of this article, where we will delve deeper into the baking process and how to achieve the perfect golden-brown crust and tender apple filling. The Maple-Kissed Apple Cinnamon Tart is just a few steps away from becoming the highlight of your autumn gatherings.
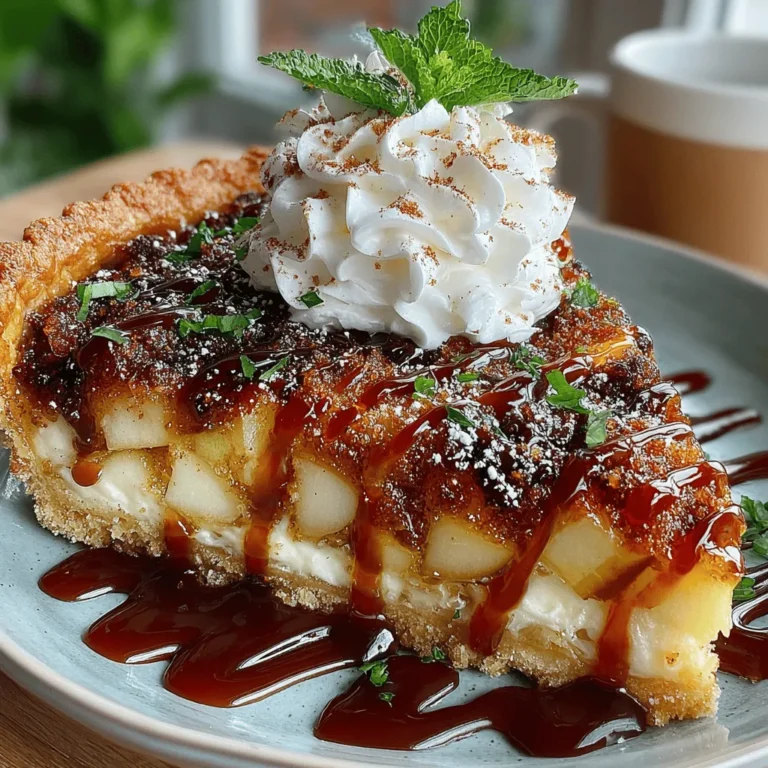
{{image_2}}
Creating a Maple-Kissed Apple Cinnamon Tart is an experience that transcends mere baking; it’s about crafting a dessert that exudes warmth, comfort, and an irresistible aroma. In this section, we will explore the marination process, baking techniques, the sweet maple glaze, and creative serving suggestions that will elevate your tart to new heights. Let’s dive into the details to ensure your tart is the star of every gathering.
Marination Process: Enhancing Flavor
One of the most crucial steps in preparing your Maple-Kissed Apple Cinnamon Tart is the marination of the apple slices. Allowing the apples to marinate not only enhances their flavor but also ensures they maintain their texture during baking.
How to Marinate the Apples
1. Slice and Soak: Begin by peeling, coring, and thinly slicing your apples. A combination of tart and sweet varieties, such as Granny Smith and Honeycrisp, works beautifully. Place the apple slices in a large bowl and sprinkle them with a mix of cinnamon, nutmeg, and a touch of salt. Drizzle with maple syrup, ensuring each slice is covered.
2. Let it Rest: Cover the bowl with plastic wrap and let the apple mixture sit for at least 30 minutes at room temperature. This allows the flavors to meld and the apples to soften slightly, making them more flavorful and tender when baked.
Spice and Sweetener Variations
Feel free to experiment with the spices and sweeteners used in the marination process. For example, you can substitute brown sugar for maple syrup or add a dash of ginger for a spicier kick. If you’re looking for a more subtle sweetness, consider using agave nectar or honey instead. The beauty of this recipe lies in its versatility; tailor it to your taste preferences for a uniquely delicious tart.
Baking the Tart to Perfection
Once the apples have marinated and are bursting with flavor, it’s time to assemble and bake your tart.
Ideal Baking Temperature and Time
Preheat your oven to 375°F (190°C). This temperature is perfect for achieving a golden-brown crust while ensuring the apples cook through without becoming mushy.
– Assemble the Tart: After rolling out your pastry dough and placing it in the tart pan, layer the marinated apple slices in an attractive spiral pattern. This not only looks stunning but also allows for even cooking.
– Bake: Place the tart in the preheated oven and bake for 35 to 40 minutes.
Checking for Doneness
Visual cues are essential when determining if your tart is ready to come out of the oven. Look for:
– Crust: The crust should be a warm golden brown and look crisp around the edges. If the edges appear too dark before the center is done, cover them with strips of aluminum foil to prevent burning.
– Apples: The apple slices should be tender and slightly caramelized. You can test for doneness by poking a slice with a fork; it should yield easily without falling apart.
Cooling Before Glazing
Once baked, it’s crucial to let the tart cool for at least 15 minutes before adding the glaze. Cooling allows the filling to set, preventing it from spilling when sliced. This resting period also enhances the flavors, creating a more cohesive taste experience.
The Sweet Maple Glaze
The maple glaze is the pièce de résistance of your tart, bringing together all the flavors in a delectable finish.
Components of the Maple Glaze
The glaze consists of pure maple syrup, butter, and a touch of vanilla extract. This combination not only adds sweetness but also enriches the overall flavor profile, giving the tart a glossy finish that invites indulgence.
Creating the Glaze
1. Melt the Ingredients: In a small saucepan, combine ¼ cup of pure maple syrup with 2 tablespoons of butter over medium heat. Stir until the butter has melted and the mixture is smooth.
2. Add Vanilla: Remove from heat and stir in ½ teaspoon of vanilla extract. This addition enhances the flavor and aroma of the glaze.
3. Achieving the Right Consistency: If the glaze appears too thin, let it simmer for an additional minute to thicken slightly. You want a syrupy consistency that drizzles easily over your tart.
Alternative Glazes and Toppings
While the maple glaze is a fantastic finish, consider other options that can complement the flavors of your tart. A simple dusting of powdered sugar or a drizzle of caramel sauce can add a delightful twist. For a touch of elegance, try a cream cheese frosting or a spiced whipped cream that pairs beautifully with the apple and cinnamon.
Serving Suggestions and Presentation
Presentation plays a key role in how your Maple-Kissed Apple Cinnamon Tart is received. Here are some creative ways to serve it:
Creative Presentation Ideas
1. Dessert Table Display: Arrange your tart on a beautiful cake stand surrounded by fresh apple slices and cinnamon sticks for a rustic look. Consider adding small bowls of whipped cream or ice cream nearby for guests to help themselves.
2. Slice Presentation: When slicing the tart, aim for even portions that showcase the layered apples. Serve each slice on a decorative plate, drizzled with the maple glaze for an appealing look.
Garnishes and Pairings
To elevate your tart further, consider these garnishes:
– Whipped Cream: A dollop of lightly sweetened whipped cream adds a creamy contrast to the tart.
– Vanilla Ice Cream: The classic pairing of warm apple tart with cold vanilla ice cream creates an irresistible combination.
Beverage Pairings
Pair your Maple-Kissed Apple Cinnamon Tart with beverages that enhance its flavors:
– Coffee: A warm cup of coffee balances the sweetness and complements the spices perfectly.
– Spiced Cider: For an autumn-inspired pairing, serve the tart with a glass of warm spiced apple cider, enhancing the tart’s comforting feel.
Conclusion
In summary, crafting the perfect Maple-Kissed Apple Cinnamon Tart involves a few key steps: marinating the apples to infuse flavor, baking at the right temperature for optimal texture, and finishing with a sweet maple glaze that ties everything together.
This tart is more than just a dessert; it’s a symbol of comfort, bringing joy to gatherings and creating lasting memories around the table. Its delightful combination of maple, apple, and cinnamon flavors will surely impress your family and friends.
We encourage you to try this recipe and experience for yourself the wonderful balance of flavors and the delightful aroma that fills your kitchen as it bakes. Embrace the joy of baking and share this delicious tart with those you love, creating moments worth savoring.