Cherry Chia Bliss Pops: A Refreshing Summer Treat
As the temperatures rise and the sun shines brighter, the craving for frozen treats becomes almost irresistible. From ice creams to sorbets, summer is synonymous with delightful frozen desserts that cool us down and satisfy our sweet tooth. However, with a growing awareness of health and wellness, many are turning to healthier alternatives that don’t compromise on taste. This is where the Cherry Chia Bliss Pops come into play—a deliciously refreshing treat that combines the joy of summer with the benefits of wholesome ingredients.
These Cherry Chia Bliss Pops are not just an indulgent dessert; they are a nutritional powerhouse. Made with creamy Greek yogurt, naturally sweet cherries, fiber-rich chia seeds, and a hint of citrus, these pops offer a delightful mix of flavors and textures that are suitable for all ages. Whether you’re looking for a guilt-free snack for your children or a refreshing dessert for yourself, these pops are the perfect solution.
Understanding the Ingredients
To appreciate the Cherry Chia Bliss Pops fully, it’s essential to understand the ingredients that make them not only delicious but also nutritious.
Greek Yogurt: A Creamy Base
Greek yogurt is at the heart of these pops, providing a creamy and rich base that enhances the overall texture. Unlike regular yogurt, Greek yogurt is strained to remove excess whey, resulting in a thicker consistency that is ideal for frozen treats. This creamy base not only elevates the mouthfeel of the pops but also offers numerous health benefits.
Packed with protein, Greek yogurt is an excellent choice for those looking to incorporate more nutrients into their diet. A single serving can contain double the protein of regular yogurt, making it a satiating option that helps keep hunger at bay. Additionally, Greek yogurt is a source of probiotics, which are beneficial for gut health, supporting digestion and overall well-being.
Cherries: Nature’s Sweet Treat
Cherries are not only delicious but also loaded with health benefits, making them a perfect addition to our Cherry Chia Bliss Pops. These vibrant fruits are rich in antioxidants, particularly anthocyanins, which are known for their anti-inflammatory properties. Eating cherries can help reduce muscle soreness and lower the risk of chronic diseases. They are also an excellent source of vitamins C and K, which support immune function and bone health, respectively.
When it comes to choosing cherries for your pops, you have the option of using fresh or frozen varieties. While fresh cherries provide a juicy burst of flavor, frozen cherries are often picked at peak ripeness and can be more convenient, especially when fresh cherries are out of season. If you choose fresh cherries, look for ones that are firm and brightly colored, avoiding any that are overly soft or blemished. If opting for frozen, make sure to select high-quality brands without added sugars or preservatives.
Chia Seeds: Nutritional Powerhouse
Chia seeds are another star ingredient in the Cherry Chia Bliss Pops. These tiny seeds are often referred to as a superfood due to their impressive nutritional profile. Chia seeds are rich in omega-3 fatty acids, fiber, and protein, making them an excellent addition to any diet. Their high fiber content helps promote digestive health and can aid in weight management by keeping you feeling full longer.
In our pops, chia seeds serve a dual purpose: they not only enhance the nutritional value but also act as a natural thickening agent. When soaked in the yogurt-cherry mixture, chia seeds absorb liquid and expand, creating a delightful texture that adds a bit of chewiness to the pops. This unique characteristic also makes them a great ingredient for other recipes, such as smoothies and puddings.
Sweeteners: Honey vs. Maple Syrup
Every good dessert needs a touch of sweetness, and for our Cherry Chia Bliss Pops, you can choose between honey and maple syrup. Both options offer distinct flavor profiles and health benefits. Honey is a natural sweetener that is sweeter than sugar, so you may find that you need less of it. It also boasts antibacterial properties and can soothe sore throats.
On the other hand, maple syrup brings its own unique flavor, offering a hint of caramel that pairs beautifully with the tartness of cherries. It is rich in antioxidants and minerals like manganese and zinc. When deciding between the two, consider your personal taste preferences and dietary restrictions. Both honey and maple syrup can be adjusted to achieve your desired level of sweetness, so don’t hesitate to experiment!
Lemon Juice: A Touch of Brightness
To balance the sweetness of the cherries and the richness of the Greek yogurt, a splash of lemon juice is added to the mixture. Lemon juice not only enhances flavor but also adds a refreshing acidity that brightens up the entire treat. The vitamin C content in lemon juice also contributes to the overall nutritional value of the pops, supporting immune function and skin health.
Salt: The Secret Ingredient
While it may seem counterintuitive to include salt in a dessert, a pinch of salt can significantly enhance the flavors of the Cherry Chia Bliss Pops. Salt helps to balance sweetness and brings out the natural flavors of the ingredients. It’s a small addition that can make a big difference in the overall taste profile of your frozen treat.
Step-by-Step Instructions
Now that you’re familiar with the key ingredients, it’s time to dive into the preparation of these delightful Cherry Chia Bliss Pops. The first step is to blend the cherries to create a smooth yet textured puree.
Blending the Cherries
To begin, you’ll want to select your cherries. If you’re using fresh cherries, wash and pit them before proceeding. For frozen cherries, simply measure out the desired amount. Place the cherries into a blender or food processor. Blend the cherries until they reach a puree consistency, but be sure to leave some small chunks for added texture in your pops. This will create a delightful contrast against the smooth yogurt base.
For the perfect cherry puree, take care not to over-blend. You want to maintain some of the fruit’s natural juiciness and texture, which will add to the overall experience of enjoying the pops. If needed, you can add a splash of water or a teaspoon of lemon juice to help facilitate blending, especially if your cherries are particularly thick.
Once blended, taste the cherry puree and adjust the sweetness if desired. You can add a drizzle of honey or maple syrup at this stage to enhance the flavor even further.
Preparing the Yogurt Mixture
With your cherry puree ready, it’s time to prepare the yogurt mixture. In a large mixing bowl, combine Greek yogurt with your choice of sweetener, a splash of lemon juice, and a pinch of salt. Stir well to combine all the ingredients evenly. The yogurt should be smooth and creamy, with a balanced flavor that complements the cherry puree.
Next, you’ll want to stir in the chia seeds. Allow the mixture to sit for about 5-10 minutes, letting the chia seeds absorb some liquid and swell. This will help create the desired texture in your pops.
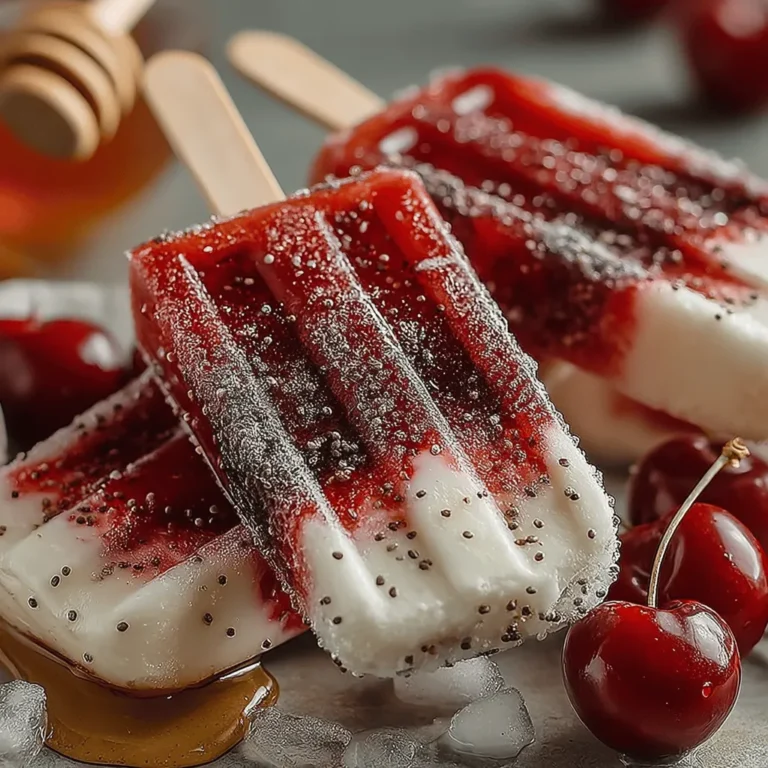
As you prepare to combine the cherry puree and yogurt mixture, consider the layering possibilities. You can either swirl the cherry puree into the yogurt for a marbled effect or layer the two mixtures in your popsicle molds for a visually stunning treat.
Stay tuned for the next part of this article, where we’ll guide you through the remaining steps to create your Cherry Chia Bliss Pops, including pouring the mixtures into molds, freezing, and enjoying these healthy summer delights!
{{image_2}}
Combining the Mixtures
Now that you have your cherry puree and yogurt mixture prepared, it’s time to combine them into one harmonious blend. The key to achieving a delightful visual appeal in your Cherry Chia Bliss Pops lies in how you fold the cherry puree into the yogurt mixture.
Importance of Evenly Distributing Chia Seeds
Before we dive into combining the mixtures, let’s address the chia seeds. These tiny seeds are packed with nutrients, including omega-3 fatty acids, fiber, and protein. However, to ensure that each pop is equally nutritious and flavorful, it is imperative to evenly distribute the chia seeds throughout the yogurt.
Mixing Techniques to Avoid Clumping
To prevent the chia seeds from clumping together, consider the following techniques:
1. Pre-Soaking: Soak the chia seeds in a small amount of water or yogurt for about 10-15 minutes before adding them to the yogurt mixture. This allows them to swell and become gel-like, making them less likely to clump when mixed in.
2. Gradual Incorporation: Add the chia seeds gradually into the yogurt mixture while stirring continuously. This will help break up any clumps and ensure an even distribution.
3. Use a Whisk: A whisk can be more effective than a spoon for mixing. The whisk’s shape allows for better aeration and integration of the chia seeds into the yogurt.
Folding in the Cherry Puree
Once your yogurt mixture is well-blended and the chia seeds are evenly incorporated, it’s time to fold in the cherry puree.
1. Gentle Folding: Use a rubber spatula to fold the cherry puree into the yogurt mixture. Start by adding a small amount of the yogurt to the cherry puree to temper it, then gently fold it back into the main yogurt mixture. This technique helps maintain the integrity of the yogurt’s texture while creating beautiful swirls.
2. Visual Appeal: The goal here is to create a marbled effect rather than fully mixing the two components. Aim for distinct swirls of cherry puree throughout the yogurt. This not only enhances the visual appeal but also ensures that each bite of your pops will have a delightful burst of cherry flavor.
Filling the Molds
With your mixture combined, the next step is to fill your molds.
Tips for Properly Filling Molds
1. Leave Room for Expansion: When filling the molds, it’s important to leave a little space at the top—about 1/4 inch. This space allows the pops to expand as they freeze, preventing overflow and ensuring a smooth texture.
2. Tapping the Molds: After you’ve filled the molds, gently tap them on the counter to release any air bubbles. This ensures that the mixture settles evenly and reduces the risk of ice crystals forming.
Types of Molds
While traditional popsicle molds work perfectly for this recipe, you can also get creative. Here are a few options:
– Silicone Molds: These are flexible and make it easy to pop out the frozen treats without any hassle.
– Ice Cube Trays: For bite-sized pops, use ice cube trays. Insert toothpicks or small sticks into the center once they begin to freeze.
– Reusable Freezer Bags: If you don’t have molds, pour the mixture into a freezer-safe bag, seal it, and cut a small corner off to squeeze out pops.
Inserting Sticks and Freezing
Once your molds are filled, it’s time to insert sticks and freeze your Cherry Chia Bliss Pops.
Inserting Sticks
1. Timing: Allow the pops to freeze for about 1-2 hours until the mixture is slightly firm but not completely solid. This will help the sticks stay upright when inserted.
2. Insert Carefully: Gently insert the sticks into the center of each pop, ensuring they are straight and evenly spaced.
Freezing for Optimal Texture
– Freezing Duration: To achieve the perfect texture, freeze the pops for a minimum of 4-6 hours, or until they are completely solid. For best results, consider freezing them overnight. This ensures a creamy texture without any icy crystals.
Unmolding and Serving
Now that your Cherry Chia Bliss Pops are fully frozen, it’s time to enjoy them!
Techniques for Easy Unmolding
1. Warm Water Trick: To release the pops from the molds, run them under warm water for a few seconds. This helps loosen the edges, allowing the pops to slide out easily.
2. Gentle Pulling: If using silicone molds, gently squeeze the sides to help release the pops. For rigid molds, a light tug on the stick should do the trick.
Serving Ideas
For an appealing presentation, consider these serving suggestions:
– Garnish with Fresh Cherries: Top each pop with a fresh cherry or a sprinkle of chia seeds for added texture and visual appeal.
– Serve with Yogurt Dipping Sauce: Create a simple yogurt dip by mixing yogurt with a touch of honey and vanilla. This adds a creamy complement to the fruity pops.
– Pair with Granola: Serve the pops alongside a small bowl of granola for a delightful crunch.
Nutritional Information
Each Cherry Chia Bliss Pop is not just a treat; it’s also a powerhouse of nutrients. Here’s a breakdown of the nutritional content per serving:
– Calories: Approximately 80-100 calories
– Protein: 2g
– Fat: 3g (healthy fats from chia seeds)
– Carbohydrates: 15g
– Fiber: 4g
Health Benefits of Main Ingredients
– Chia Seeds: Rich in omega-3 fatty acids, these tiny seeds support heart health and are excellent sources of fiber.
– Cherries: Packed with antioxidants, cherries help reduce inflammation and support overall wellness.
– Greek Yogurt: A fantastic source of protein and probiotics, Greek yogurt promotes digestive health while keeping you full.
Variations and Customization
Flavor Variations
Feel free to get creative with flavors! Here are some alternative fruits you can use with the same base recipe:
– Blueberries: Swap out cherries for fresh or frozen blueberries for a burst of flavor and antioxidants.
– Strawberries: Use ripe strawberries to make a classic strawberry yogurt pop that everyone will love.
– Mango: For a tropical twist, substitute the cherry puree with mango puree for a refreshing variation.
Dietary Modifications
To make the Cherry Chia Bliss Pops vegan or dairy-free, consider these swaps:
– Plant-Based Yogurt: Replace Greek yogurt with coconut yogurt or almond yogurt. Both offer a creamy texture without dairy.
– Sweeteners: If you prefer a sweeter pop, consider using maple syrup or agave nectar instead of honey.
Add-Ins for Extra Nutrition
Enhance the nutritional profile of your pops with these add-ins:
– Nuts and Seeds: Chopped almonds or walnuts can be folded into the mixture for added crunch and healthy fats.
– Superfoods: Consider adding a tablespoon of hemp seeds or spirulina for an extra boost of nutrients.
Conclusion
Cherry Chia Bliss Pops are a delightful way to indulge in a healthy dessert that doesn’t compromise on flavor. With their vibrant color, refreshing taste, and nutritional benefits, these pops are ideal for summer days or any time you crave a sweet treat.
We encourage you to experiment with this recipe, trying different fruits and add-ins to make it your own. The joy of creating homemade treats lies in the ability to customize and innovate, providing your family with healthy options that are both satisfying and delicious. Enjoy the process and delight in every bite!


