
Introduction
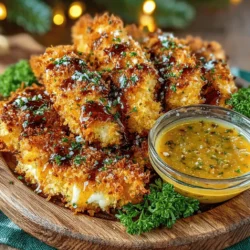
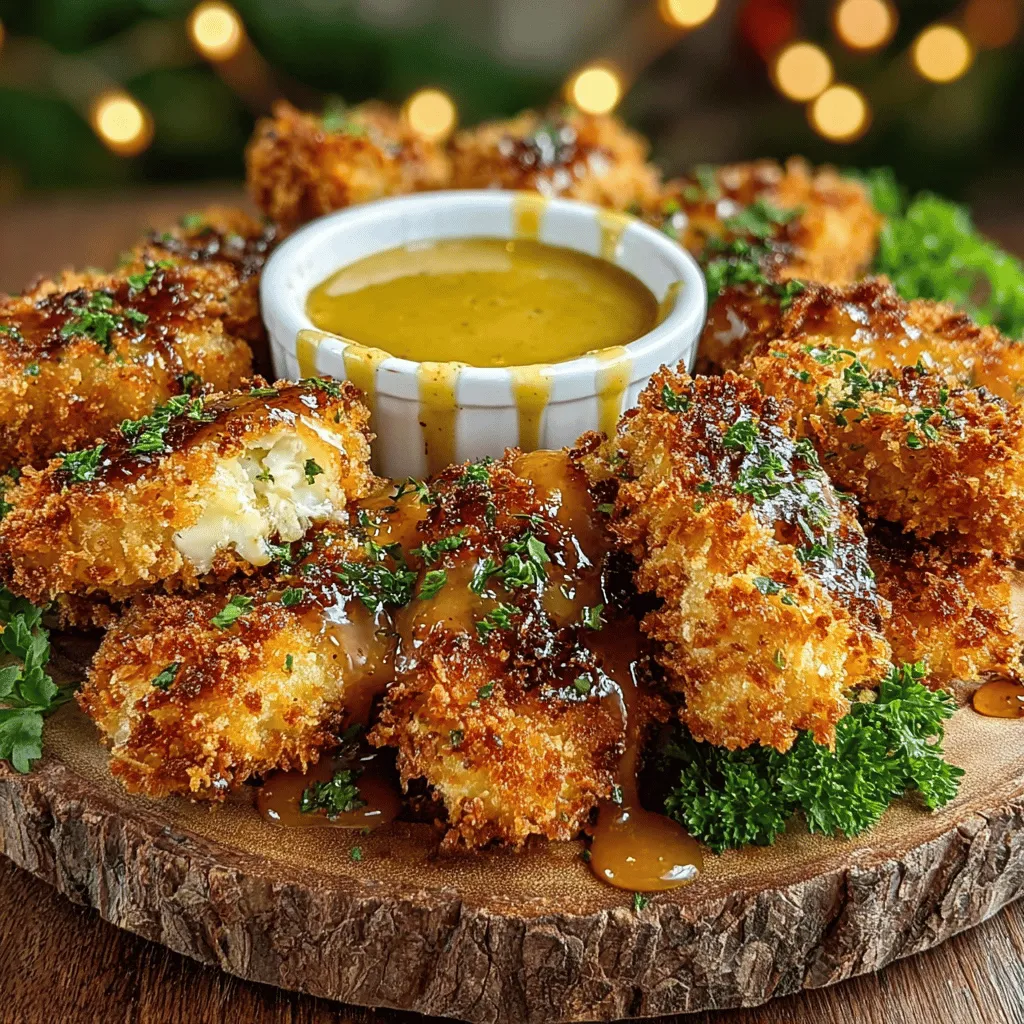
Chicken tenders have long held a cherished place in the hearts (and stomachs) of food lovers everywhere. This classic comfort food is beloved for its crispy exterior and tender, juicy interior, making it a favorite among families and children alike. Whether served as a quick weeknight dinner, a party platter, or a snack for game day, chicken tenders can satisfy cravings and bring people together. In this recipe, we take the quintessential chicken tender and give it a delightful twist by pairing it with a sweet honey mustard dip that perfectly balances flavors and adds an extra layer of enjoyment.
Homemade chicken tenders stand out not only for their taste but also for the sense of accomplishment that comes from creating a meal from scratch. Making chicken tenders at home allows you to control the ingredients, ensuring a healthier option while still delivering on flavor and crunch. This recipe for Crunchy Golden Chicken Tenders with Sweet Honey Mustard Dip is designed to be straightforward, making it accessible for cooks of all experience levels. By following these steps, you’ll have a dish that impresses at family meals and gatherings alike.
Understanding the Ingredients
To create perfect chicken tenders, understanding the ingredients is key. The main components include chicken breast, buttermilk, a blend of spices, panko breadcrumbs, and the ingredients for the honey mustard dip. Each of these elements plays a critical role in developing the flavor and texture of the dish.
Chicken Breast
The star of the show is boneless, skinless chicken breast, which is known for its versatility and mild flavor. When cut into strips, chicken breast becomes perfect for frying, as it cooks quickly and retains moisture.
Buttermilk
One of the secrets to achieving tender chicken tenders lies in the marination process, particularly with buttermilk. Buttermilk contains lactic acid, which helps to break down proteins in the chicken, resulting in a more tender and flavorful meat. Additionally, it adds a subtle tang that enhances the overall taste of the dish. For the best results, marinating the chicken in buttermilk for at least an hour (or overnight for maximum flavor) is recommended.
Spices
The spice blend used in this recipe is designed to elevate the chicken’s flavor profile. Key ingredients include garlic powder, paprika, and cayenne pepper.
– Garlic Powder: This ingredient adds depth and a savory note that complements the chicken beautifully.
– Paprika: It brings a sweet, smoky flavor and a vibrant color to the breading, enhancing both taste and visual appeal.
– Cayenne Pepper: For those who enjoy a bit of heat, cayenne pepper introduces a gentle kick. Adjusting the amount can cater to varying spice tolerances.
Panko Breadcrumbs
To achieve that coveted crunch, panko breadcrumbs are preferred over traditional breadcrumbs. Panko, made from crustless bread, is coarser and larger, creating a light and airy texture that crisps up beautifully when fried or baked. This extra crunch is what sets these chicken tenders apart and makes them irresistibly satisfying.
Honey Mustard Dip
No chicken tender is complete without a dip, and the sweet honey mustard dip is a perfect companion. This dip is made with simple ingredients: honey, Dijon mustard, and a touch of mayonnaise for creaminess. The sweetness of the honey pairs perfectly with the tangy mustard, creating a balanced condiment that enhances the flavors of the chicken tenders while providing a delightful contrast.
Marinating the Chicken for Maximum Flavor
The marination process is one of the most crucial steps in preparing chicken tenders. By soaking the chicken strips in buttermilk mixed with spices, you allow the flavors to penetrate the meat while also tenderizing it.
For effective marination, place the chicken strips in a bowl or a resealable plastic bag, covering them completely with the buttermilk mixture. It’s essential to allow enough time for the chicken to soak. While marinating for just one hour can still yield tasty results, letting the chicken marinate overnight allows for deeper flavor infusion and enhanced tenderness.
Marinating not only improves the taste but also helps keep the chicken moist during cooking. As the chicken cooks, the buttermilk creates a barrier that locks in moisture, preventing the meat from drying out. For those short on time, even a quick 30-minute soak can provide a noticeable difference in flavor compared to unseasoned strips.
Preparing the Breading Station
Once the chicken has marinated, it’s time to prepare the breading station. Setting up an efficient breading station is essential for a smooth cooking process and ensures that every chicken strip is evenly coated.
Step-by-Step Process
1. Gather the Ingredients: Ensure you have all necessary ingredients at hand, including flour, beaten eggs, and panko breadcrumbs. Having everything in one area minimizes movement and keeps your workflow organized.
2. Set Up Separate Dishes: Use three shallow dishes for the breading process:
– First Dish: Fill with all-purpose flour, seasoned with a pinch of salt and pepper.
– Second Dish: Beat a few eggs in a bowl; this will act as the binding agent for the breadcrumbs.
– Third Dish: Pour the panko breadcrumbs mixed with the spice blend.
3. Organize the Workflow: Arrange the dishes in a line from left to right: flour, egg, and panko. This setup allows for a systematic coating process, preventing cross-contamination and mess.
4. Keep It Neat: Use one hand for wet ingredients (egg) and the other for dry (flour and breadcrumbs). This method keeps your fingers less sticky and makes the process more efficient.
Coating the Chicken Strips
Coating the chicken strips is the final step before cooking, and it’s vital for achieving that signature crunch. Here’s how to do it:
1. Dredge in Flour: Take a marinated chicken strip and coat it lightly in the flour, shaking off any excess. This step helps the egg adhere better.
2. Dip in Egg: Next, dip the flour-coated chicken into the beaten egg, ensuring it’s fully covered. Allow any excess egg to drip off.
3. Coat with Panko: Finally, roll the chicken strip in the panko breadcrumbs, pressing gently to ensure the crumbs stick well. Make sure each strip is evenly coated for maximum crunch.
4. Repeat: Continue this process for all chicken strips, placing them on a parchment-lined baking sheet or a plate as you go.
By following these steps with attention to detail, you’ll set yourself up for success in creating the most flavorful and crunchy chicken tenders, enhanced by a delicious honey mustard dip that everyone will love.
Importance of Dredging
Dredging is a crucial step in achieving that irresistible crunchy texture in your chicken tenders. The process involves three key stages: first, coating the chicken in flour, then dipping it in buttermilk, and finally rolling it in breadcrumbs.
1. Flour Coating: The initial dredging in flour helps to absorb moisture from the chicken and creates a base layer that allows the buttermilk to adhere better. This step is vital as it creates a barrier that helps retain the chicken’s juices during cooking, resulting in a tender, juicy interior.
2. Buttermilk Dip: Soaking the chicken tenders in buttermilk not only adds flavor but also acts as a marinade. The acidity in buttermilk helps to tenderize the meat. Make sure the chicken is fully submerged in the buttermilk for at least 30 minutes for optimal results.
3. Breadcrumb Layer: The final coating of breadcrumbs is where the crunch factor comes into play. For best results, use panko breadcrumbs, as they create a lighter and crispier crust than traditional breadcrumbs. To achieve an even coating, press the chicken tenders firmly into the breadcrumbs, ensuring they are fully covered.
Tips for Achieving an Even Coating and the Right Texture
– Work in Batches: Dredging a few tenders at a time prevents clumping and ensures an even coating. This method allows you to handle each piece with care, ensuring every inch of the chicken is covered.
– Use One Hand for Wet and One for Dry: To avoid a messy situation, designate one hand for the wet ingredients (buttermilk) and the other for the dry (flour and breadcrumbs). This technique helps maintain a cleaner workspace and ensures that your hands don’t get overly sticky.
Frying the Chicken Tenders
Frying chicken tenders is an art that requires attention to detail for the perfect result. Here’s how to do it right:
Detailed Instructions on Frying Techniques
1. Heat the Oil: In a heavy-bottomed skillet or deep fryer, add enough oil to cover the chicken tenders by about 1-2 inches. Heat the oil to 350°F (175°C). This temperature is crucial for achieving that golden, crispy exterior without overcooking the chicken inside.
2. Test the Oil Temperature: If you don’t have a thermometer, you can test the oil by dropping a small piece of bread into it. If it sizzles and turns golden brown in about 60 seconds, the oil is ready.
3. Fry in Batches: Avoid overcrowding the pan, as this can lower the oil temperature and lead to soggy tenders. Fry the chicken in batches, ensuring each piece has enough space to fry evenly. Depending on the size of your skillet, this may mean frying 3-5 tenders at a time.
4. Cook Until Golden: Fry each batch for about 4-5 minutes on each side, or until they are a deep golden brown. The chicken should reach an internal temperature of 165°F (74°C) for safety. You can check by inserting a meat thermometer into the thickest part of the tender.
Tips for Knowing When the Chicken is Done
– Visual Cues: Look for a deep golden color on the outside. The crust should be crispy and firm to the touch.
– Internal Temperature: Always ensure the chicken is cooked to the recommended temperature. Use a meat thermometer for accuracy.
Making the Honey Mustard Dip
The sweet honey mustard dip is the perfect accompaniment to your crunchy chicken tenders, providing a delightful contrast of flavors.
Step-by-Step Instructions for Preparing the Dip
1. Combine Ingredients: In a small bowl, mix equal parts of Dijon mustard and honey. Start with ¼ cup of each, adjusting to your taste.
2. Add Additional Flavorings: For an extra kick, consider adding a splash of apple cider vinegar or a pinch of cayenne pepper to the mixture. This will enhance the flavor profile and add depth to the dip.
3. Stir Until Smooth: Whisk the ingredients together until well combined. Taste and adjust the sweetness or tanginess according to your preference.
Balancing Flavors
The key to a great honey mustard dip is achieving a balance between the sweetness of the honey and the tanginess of the Dijon mustard. If you prefer a sweeter dip, add more honey. For a tangier flavor, increase the amount of mustard.
Suggestions for Customizing the Dip
– Herbs: Incorporate fresh herbs like dill or thyme for added freshness.
– Spices: Experiment with spices such as smoked paprika or garlic powder for a unique twist.
– Heat: If you enjoy a bit of heat, consider adding a few drops of hot sauce or a pinch of chili powder.
Serving Suggestions and Presentation
Once your chicken tenders and honey mustard dip are ready, it’s time to serve!
Ideas for Serving the Chicken Tenders and Dip
– Platter Display: Arrange the crunchy chicken tenders on a large platter with a small bowl of the honey mustard dip in the center. This not only looks inviting but encourages sharing.
– Individual Portions: For a more personal touch, serve each guest their own small dish of dip alongside a portion of chicken tenders.
Garnishing Tips
– Fresh Herbs: Sprinkle some chopped parsley or cilantro over the chicken tenders for a pop of color and freshness.
– Lemon Wedges: Add lemon wedges on the side for a zesty flavor boost. A quick squeeze of lemon over the tenders before eating can elevate the dish beautifully.
Side Pairing Suggestions
For a complete meal experience, consider serving your chicken tenders with:
– Coleslaw: The crunch of coleslaw pairs perfectly with the tenders and adds a refreshing contrast.
– Sweet Potato Fries: Their natural sweetness complements the honey mustard dip beautifully.
– Vegetable Medley: A side of roasted or steamed vegetables can provide a healthy balance to the meal.
Nutritional Breakdown
Understanding the nutritional aspects of your homemade chicken tenders can help you enjoy them guilt-free.
Overview of Nutritional Aspects
– Protein-Rich: Chicken tenders are a great source of lean protein, which is essential for muscle growth and repair.
– Balanced Fat: While frying adds some fat, using a heart-healthy oil, such as canola or avocado oil, can keep the dish nourishing.
Discussion on Portion Sizes and Meal Balance
When serving chicken tenders, aim for a balanced plate. Consider a serving size of 3-4 tenders accompanied by a side of vegetables and a small portion of a carbohydrate like sweet potato fries or a whole grain.
Conclusion
Making homemade crunchy golden chicken tenders is not just about the flavors; it’s about the joy of cooking and sharing delicious food with loved ones. This recipe offers a versatile base that can be customized for various occasions, whether it’s a casual family dinner or a fun gathering with friends.
The combination of crispy chicken and the sweet, tangy honey mustard dip is bound to become a family favorite. Don’t hesitate to experiment with different flavors and sides, making this dish your own. With every batch, you’ll discover new ways to enjoy these tasty tenders, ensuring they remain a staple in your culinary repertoire. So grab your ingredients, and let the cooking adventure begin!